"How to make PCB at home ?" is always an question in front of all electronics hobbyist. Here i will teach you most common method used at home for making PCB, known as "Toner Transfer Method". It is a very easy and cheap process of making a PCB at home.
Here is the list of all the things you will be going to need to make an PCB
1. Copper PCB board.
2. A photo paper (also known as glossy paper).
3. Ferric Chloride FeCl2 solution. (Substitute for ferric cholride : The mixture of HCl acid and Hydrogen Peroxide, in the proportion 1:2 i.e one parts of HCl and two part of hydrogen Peroxide)
4. Plastic container.
5. Electrical or Masking tape.
6. Electric Iron.
7. Acetone.
8. Drill
Before starting let me give you a idea used in this process for making PCB. We have to take a print of our design on a photo paper (glossy paper) with laser printer only, because laser printer ink is made up of plastic material which we can easily transfer to the copper board by giving heat through iron, as we are using glossy paper the transfer will be done easily as compared to the simple paper. After we have got the print on the copper board we can use chemical to etched unneeded copper from the board
Steps to make PCB
Step 1 : Print your circuit diagram on a photo paper (glossy paper) using Laser printer only.
Step 2 : Clean the copper PCB board neatly with an polish paper
Step 3 : Face the printed side of the paper towards the copper board. Attach some tapes to the paper and board, so that the paper do not move.
Step 4 : Give some heat to the paper so that all the ink on the paper get transferred to the copper board, resulting in the formation of plastic circuit on the copper board.
Make sure that you give sufficient heat and pressure as well. While giving heat you will observe that the paper will slowly become black in color. Continue the process until your paper get sticks the copper pcb.
Now remove the paper and wash the PCB with water nicely
(Tip: For easy transfer of the ink rub copper layer of PCB with Polish paper and make it rough)
Step 5 : Take a plastic container and pour Ferric chloride solution in the container, make sure that your PCB dip in that solution. Keep shaking the container until the unneeded copper layer get dissolved in the solution.
"Substitute for ferric chloride is mixture of HCl and Hydrogen peroxide in the ratio 1:2 i.e is 2 parts of Hydrogen peroxide and 1 part of HCl. ( HCl is also known as Hydrochloric acid and it can be found in the hardware store, whereas Hydrogen peroxide can be easily found at chemist store )"
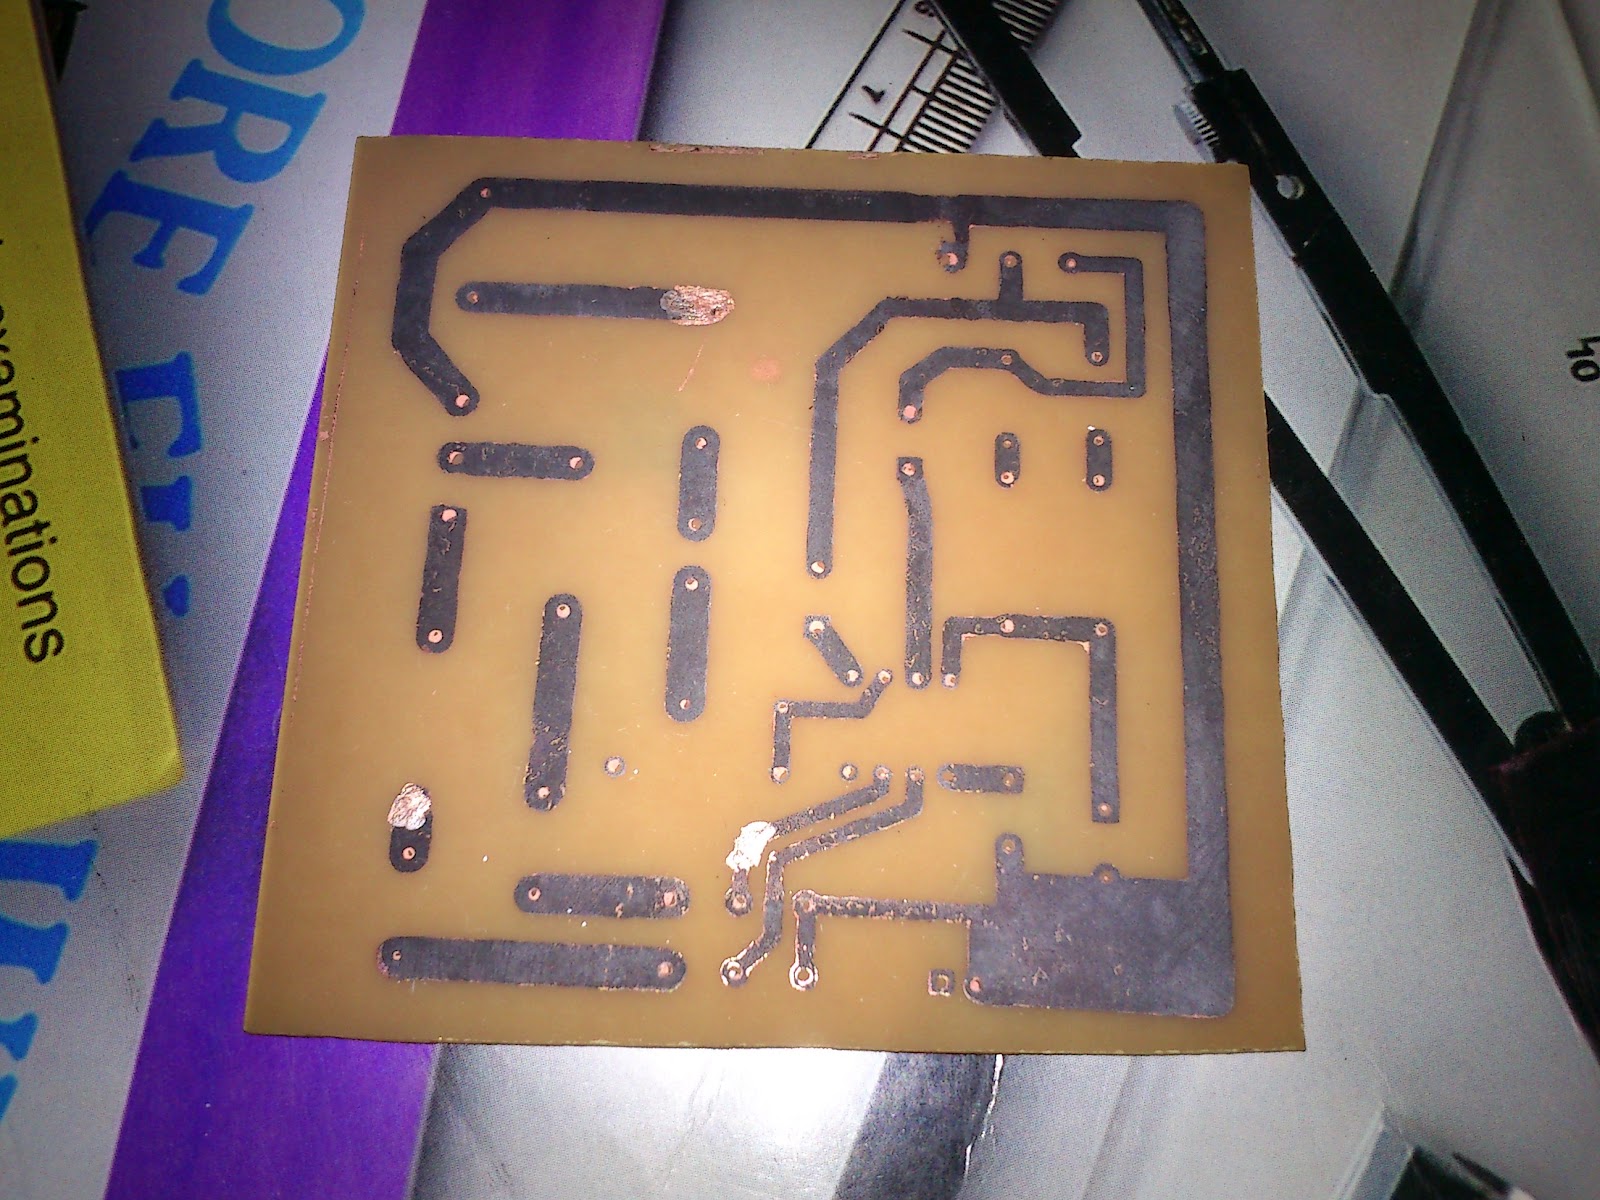
Step 6 : Take few drops of Acetone on a piece of cotton and clean all the ink on the board nicely. Your final circuit board will look like this,
Step7 : The last step is to Drill your PCB, drill the holes and enjoy making PCB at home

If you have any doubt or question, please help me to help you
Thanks! for reading, if you like it don't forget to share it.
Also subscribe to our free email subscription for latest updates.
Here is the list of all the things you will be going to need to make an PCB
1. Copper PCB board.
2. A photo paper (also known as glossy paper).
3. Ferric Chloride FeCl2 solution. (Substitute for ferric cholride : The mixture of HCl acid and Hydrogen Peroxide, in the proportion 1:2 i.e one parts of HCl and two part of hydrogen Peroxide)
4. Plastic container.
5. Electrical or Masking tape.
6. Electric Iron.
7. Acetone.
8. Drill
Concept
Before starting let me give you a idea used in this process for making PCB. We have to take a print of our design on a photo paper (glossy paper) with laser printer only, because laser printer ink is made up of plastic material which we can easily transfer to the copper board by giving heat through iron, as we are using glossy paper the transfer will be done easily as compared to the simple paper. After we have got the print on the copper board we can use chemical to etched unneeded copper from the board
Steps to make PCB
Step 1 : Print your circuit diagram on a photo paper (glossy paper) using Laser printer only.
 | |
| Copper board and Print |
Step 2 : Clean the copper PCB board neatly with an polish paper
Step 3 : Face the printed side of the paper towards the copper board. Attach some tapes to the paper and board, so that the paper do not move.
 |
| Printout sticked an copper PCB by tapes |
Step 4 : Give some heat to the paper so that all the ink on the paper get transferred to the copper board, resulting in the formation of plastic circuit on the copper board.
 |
| Applying heat and pressure |
Make sure that you give sufficient heat and pressure as well. While giving heat you will observe that the paper will slowly become black in color. Continue the process until your paper get sticks the copper pcb.
 |
| Removing the paper |
Now remove the paper and wash the PCB with water nicely
 |
| Print on the copper board |
(Tip: For easy transfer of the ink rub copper layer of PCB with Polish paper and make it rough)
Step 5 : Take a plastic container and pour Ferric chloride solution in the container, make sure that your PCB dip in that solution. Keep shaking the container until the unneeded copper layer get dissolved in the solution.
 |
| Etching copper PCB |
"Substitute for ferric chloride is mixture of HCl and Hydrogen peroxide in the ratio 1:2 i.e is 2 parts of Hydrogen peroxide and 1 part of HCl. ( HCl is also known as Hydrochloric acid and it can be found in the hardware store, whereas Hydrogen peroxide can be easily found at chemist store )"
 |
| Etched copper circuit board |
Step 6 : Take few drops of Acetone on a piece of cotton and clean all the ink on the board nicely. Your final circuit board will look like this,
 |
| Final Board |
Step7 : The last step is to Drill your PCB, drill the holes and enjoy making PCB at home

If you have any doubt or question, please help me to help you
Thanks! for reading, if you like it don't forget to share it.
Also subscribe to our free email subscription for latest updates.
nice post, going to try it soon,
ReplyDelete#Thanks!